Tkinter Radiobutton Tutorial
The Radiobutton name comes from the radio button, which could be used to select a specific channel in the radio era. The most important feature of the options button is that you can select this option with a single mouse click, while only one option can be selected at a time. For example, when filling out a degree, you will see a series of options, such as high school, college, master’s, and doctorate, and only one item can be checked at this time. The most common way to design option buttons is to have them as text. Like labels we can also design option buttons with images.
Programming can be designed so that option buttons are tied to functions (or methods) that automatically execute the associated function or method when the appropriate option button is selected. Alternatively, the program may be designed to have multiple sets of option buttons, in which case it can be designed so that a set of option buttons has an associated variable with which to bind the set of option buttons.
In this case, the Radiobutton() method can be used to create the above series of option buttons, with the following syntax format.
Radiobutton(master, options, ...)The first parameter of the Radiobutton() method is the parent object, indicating which parent object this option button will be built into.
The following are other commonly used options parameters within the Radiobutton() method.
(1) activebackground: the background color when the mouse cursor is on the option button.
(2) activeforeground: the foreground color when the mouse cursor is on the option button.
(3) anchor: control the position of the option button if the space is larger than needed, default is CENTER.
(4) bg: the background color of the label background or indicator.
(5) bitmap: bitmap image object.
(6) borderwidth or bd: the border width is two pixels by default.
(7) command: When the user changes the options, this function will be automatically executed.
(8) cursor: the cursor shape when the mouse cursor is on the option button.
(9) fg: text foreground color.
(10) font: font shape.
(11) height: how many lines of text on the option button, default is 1 line.
(12) highlightbackground: the background color when the option button gets focus.
(13) highlightcolor: the color of the option button when it gets the focus.
(14) image: image object, you can use this parameter if you want to create an option button with image.
(15) indicatoron: when this value is 0, the box option button can be created.
(16) justify: when containing multiple lines of text, the alignment of the last line of text.
(17) padx: default is 1, you can set the interval between the option button and the text.
(18) pady: default is 1, you can set the spacing between the top and bottom of the option buttons.
(19) selectcolor: the color of the option button when it is selected.
(20) selectimage: if the image option button is set, you can thus set a different image when the option button is selected.
(21) state: the default is state=NORMAL, if DISABLE is set, the option button will be displayed in gray scale to indicate that it is temporarily unavailable.
(22) text: the text next to the option button.
(23) textvariable: display the option button text as a variable.
(24) underline: you can set the number of text with underline, starting from 0. The default is -1, which means no underline.
(25) value: the value of the option button, you can distinguish the selected option button.
(26) variable: set or get the currently selected radio button, its value type is usually IntVar or StringVar.
(27) width: the text of the option button is a few characters wide, and will adjust itself to the actual width when omitted.
(28) wraplength: limit the number of text per line, the default is 0, which means only "\n" will change the line.
The way to bind the whole set of option buttons is as follows.
var IntVar
rb1 = Radiobutton(root, ..., variable=var, value=x1, ...)
rb2 = Radiobutton(root, ..., variable=var, value=x2, ...)
...
rbn = Radiobutton(root, ..., variable=var, value=x3, ...)
In the future, if you want to get the option selected by this group of option buttons, you can use the get( ) method, which will pass back the value of the parameter value of the selected option. The method set( ) can set the initial default value option.
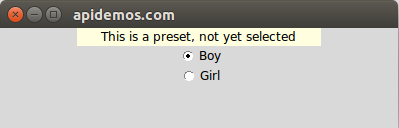
Tkinter Radiobutton Tutorial Example#1
This is a simple application of the option button, the default option is "boy" when the program is first executed, then the top of the window shows not yet selected, then you can choose "boy" or "girl", after the selection is complete, you can display "you are a boy" or "you are a girl".
from tkinter import *

def printSelection():
    num = var.get()
    if num == 1:
        label.config(text="You are a boy")
    else:
        label.config(text="You are a girl")

root = Tk()
root.title("apidemos.com")

var = IntVar()
var.set(1)

label = Label(root,text="This is a preset, not yet selected",bg="lightyellow",width=30)
label.pack()

rbman = Radiobutton(root,text="Boy",                  # Boy's option button
                    variable=var,value=1,             # value is used to distinguish the selected option button
                    command=printSelection)           # Girl's option buttion
rbman.pack()
rbwoman = Radiobutton(root,text="Girl",
                    variable=var,value=2,
                    command=printSelection)
rbwoman.pack()

root.mainloop()
Output:
Line 13 above is setting the var variable to be an IntVar( ) object, which is also an integer type.
Line 14 is to set the default option to be 1, which in this case is equivalent to the default being boys.
Lines 16 and 17 set the label information.
Lines 19 to 22 are for creating the "Boys" option button.
Lines 23 to 26 are for creating the "Girl" option button. When a new radio button is created, the function in lines 3 to 8 will be executed. This function will get the value of the current option button from var.get( ), and then use this value to determine if the selected one is a boy or a girl, and finally use the config( ) method to set the boy or girl to the text of the label object label, so you can see the selected result.
The above procedure is to let the reader understand get ( ) and set ( ) method to obtain and set the var value is the value of the parameter value, after familiar with the operation of the option button, this field can be handled with a string, usually set the text content and value content is the same, this time in the processing callback function (in this case is printSelection) When dealing with the callback function (in this case, printSelection), it is clearer and easier to understand, and the whole program can be more concise.
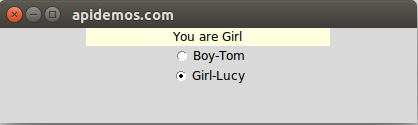
Tkinter Radiobutton Tutorial Example#2
Using a string to set the value parameter value within the Radiobutton method, redesign ch7_1.py. The reader will notice that the printSelection( ) function replaces the original lines 4 to 8 with only line 4.
from tkinter import *
def printSelection():
    label.config(text="You are "+var.get())

root = Tk()
root.title("apidemos.com")    # Set window title

var = StringVar()         # Variables bound to option buttons
var.set("Boy")             # Default option is male
# var.set("Birth")
# var.set(0)           # You can set no default options initially
label = Label(root,text="This is a preset, not yet selected",bg="lightyellow",width=30)
label.pack()

rbman = Radiobutton(root,text="Boy-Tom",                  # Boy's option button
                    variable=var,value="Boy",             # value is used to distinguish the selected option button
                    command=printSelection)               # Girl's option buttion
rbman.pack()
rbwoman = Radiobutton(root,text="Girl-Lucy",
                    variable=var,value="Girl",
                    command=printSelection)
rbwoman.pack()

root.mainloop()
Output: